
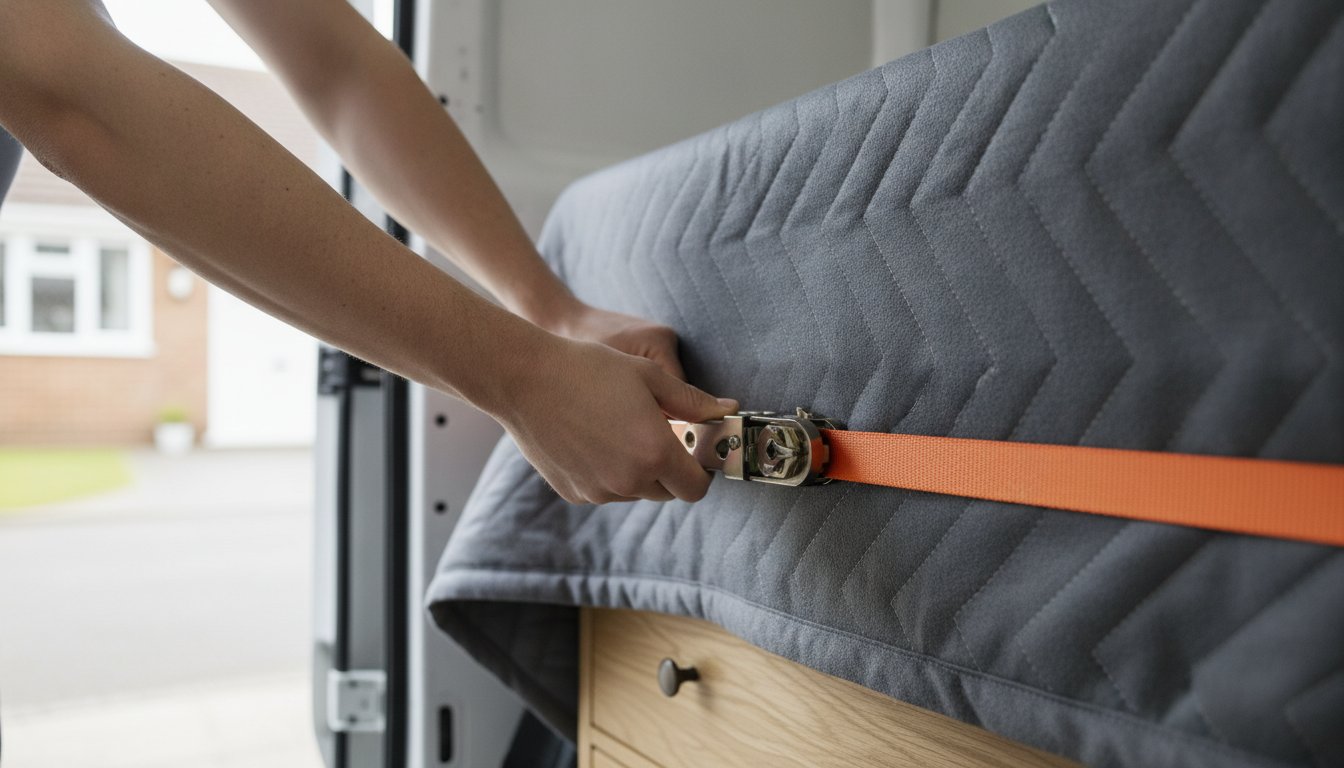
Imagine the sinking feeling when you open the back of your removal van after a long drive only to find your favourite oak wardrobe has toppled over, its polished surface marred by a deep scratch from a metal buckle. It's a common fear for anyone tackling a DIY move, and the anxiety of items shifting mid-journey can make the drive feel twice as long. You've invested a lot in your home, so it's only natural to want every chest of drawers and dining table to arrive in perfect condition. Learning how to use webbing straps for moving is the most effective way to turn that worry into confidence.
In this guide, we'll help you master the art of securing your furniture like a professional removalist to ensure a damage-free move across the UK. We understand that professional-grade equipment can look a bit intimidating at first, especially if you're worried about jammed ratchets or complex threading. We'll walk you through the process step-by-step, from choosing the right strength of webbing to the simple trick for releasing a tight strap safely. By the time you've finished reading, you'll have the skills to create a stable, secure van load that stays exactly where you put it.
Key Takeaways
- Learn the difference between webbing ties and ratchet straps to ensure you select the right tool for both lightweight items and heavy furniture.
- Discover how to use webbing straps for moving by identifying reliable anchor points and applying the "Blanket Buffer" rule to protect your belongings.
- Follow a simple threading process that keeps your load stable while avoiding the common error of over-tensioning, which can crush cardboard boxes.
- Understand why flat, untwisted straps are essential for even pressure distribution and the long-term safety of your furniture's finish.
- Organise your van using the professional "Tier" system to create a secure, balanced load that won't shift during your journey across the UK.
Understanding Your Tools: Webbing Ties vs Ratchet Straps
Choosing the right equipment is the foundation of a stress-free house move. If you've ever stood in the back of a hire van staring at a pile of tangled straps, you aren't alone. Most people assume all straps are the same, but the difference between a simple tie and a heavy-duty ratchet is often the difference between a secure load and a broken heirloom. A standard web lashing assembly consists of high-tenacity polyester webbing designed to resist stretching and abrasion. This material is the industry standard because it stays taut even if the weather turns damp during your move.
Most domestic webbing straps are 25mm or 50mm wide. The wider the strap, the more surface area it covers, which helps distribute pressure across your furniture. Always check the weight rating; you'll usually find this on a small blue or green tag sewn into the seam. If that tag is missing or the fabric is frayed, don't use it. Safety is about knowing exactly what your kit can handle before you start tensioning it against a heavy wardrobe.
Understanding how to use webbing straps for moving begins with selecting the right tensioning method for the job. You wouldn't use a sledgehammer to hang a picture frame; similarly, you shouldn't use a heavy-duty ratchet to secure a delicate lamp. Using the wrong tool can lead to crushed boxes or snapped wood. Conversely, relying on weak ties for a fridge-freezer is a recipe for disaster.
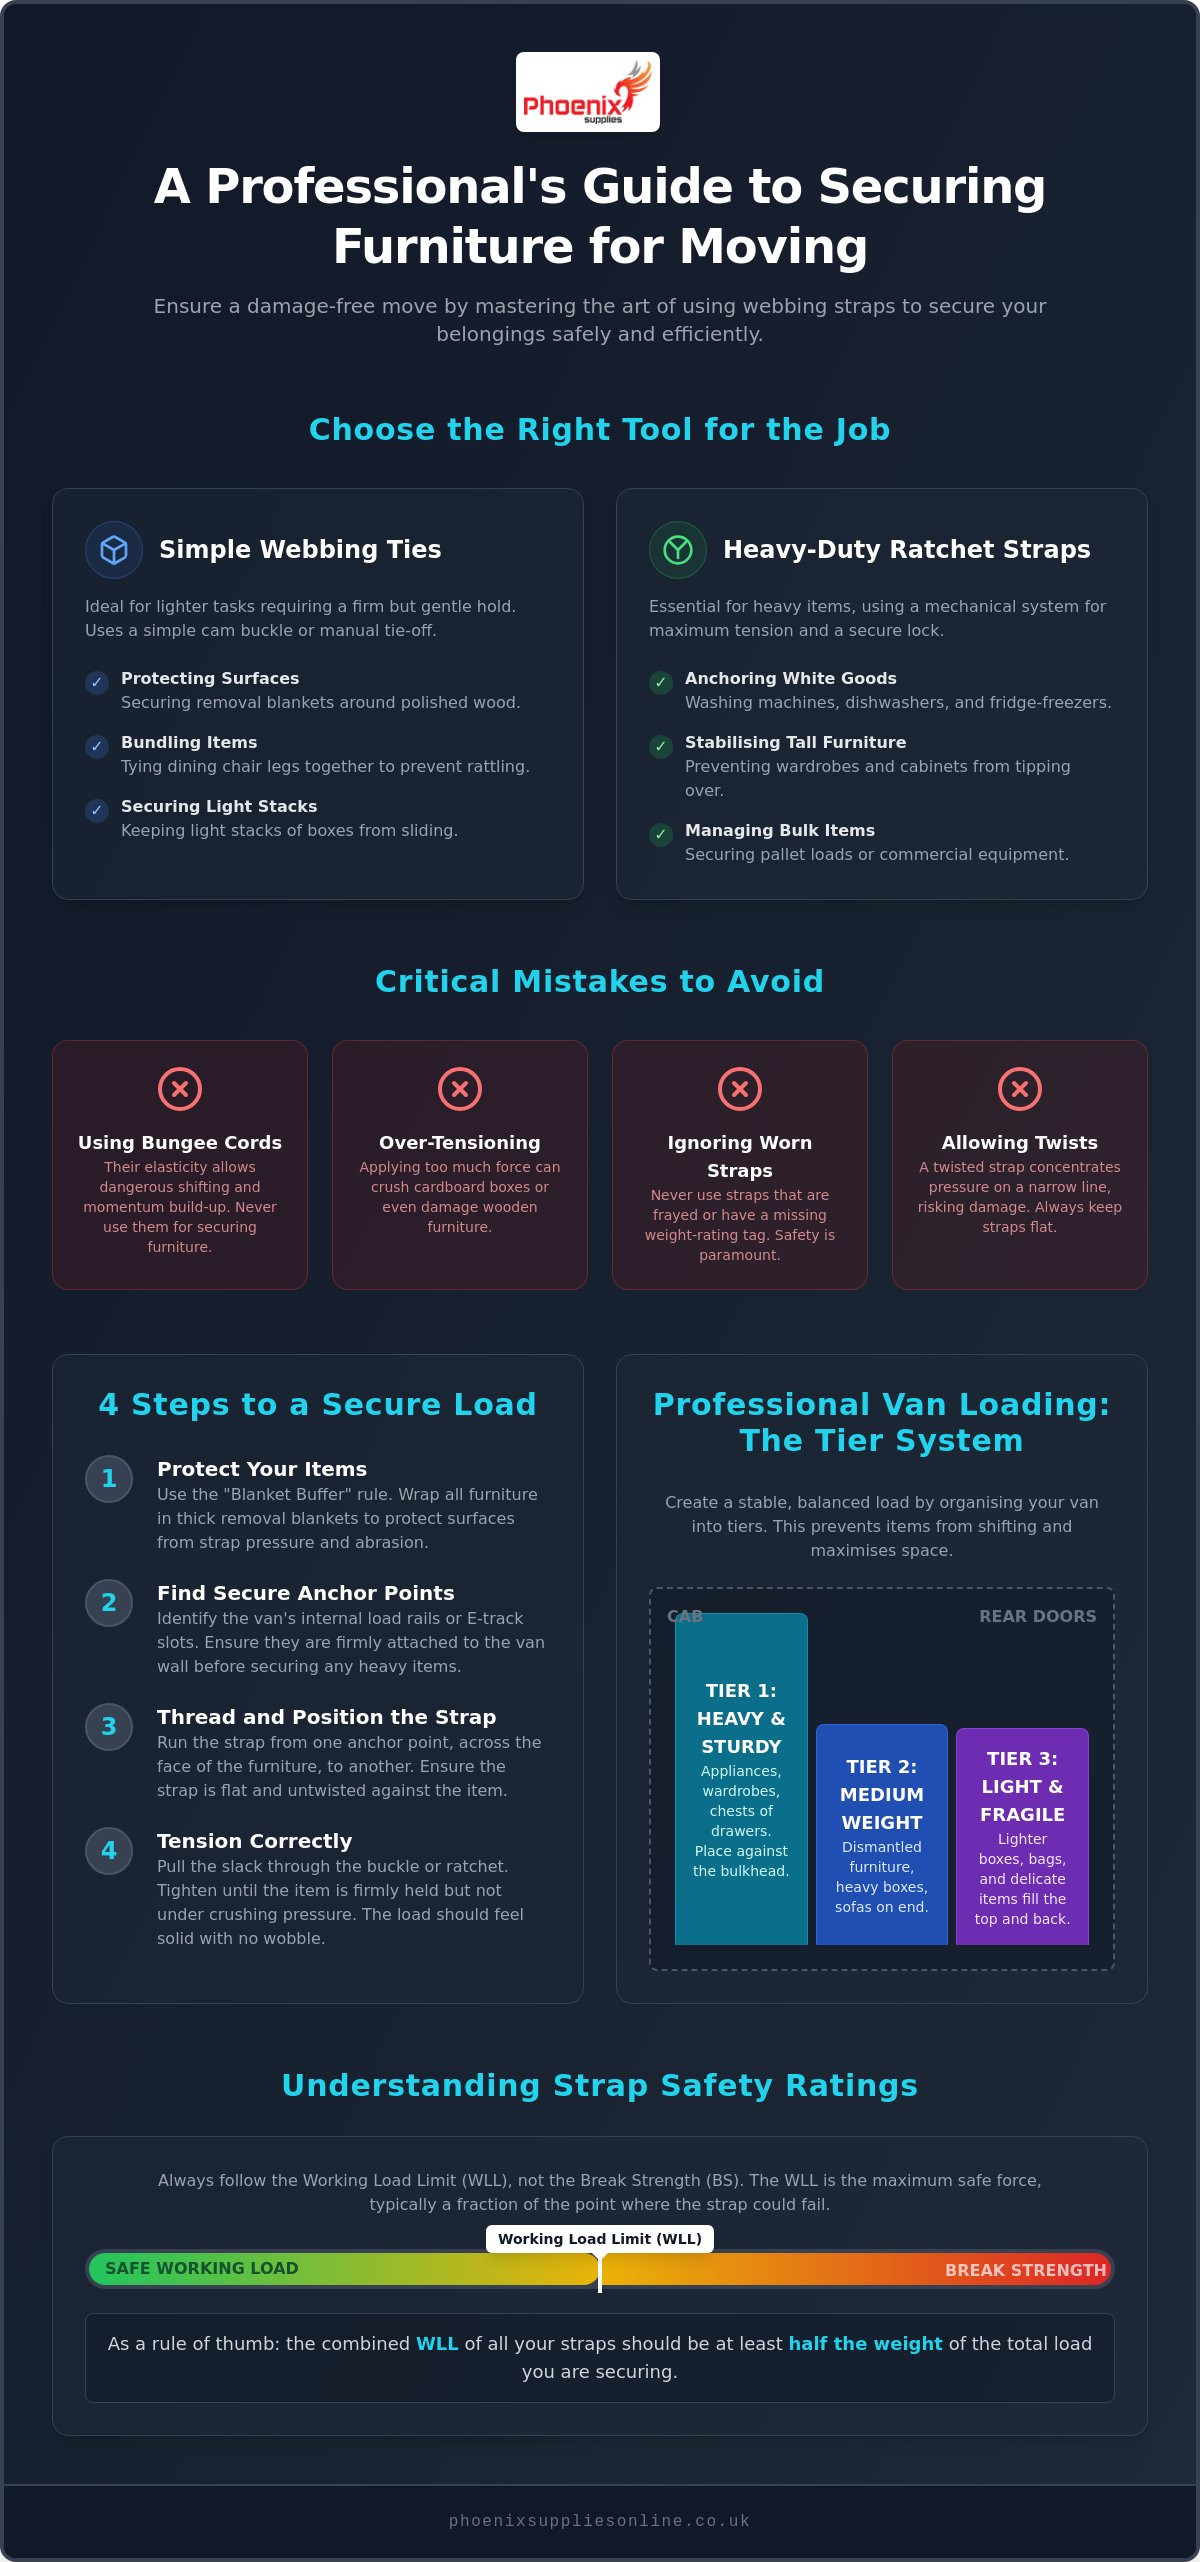
Bungee cords are often the first thing people grab from the garage, but they are a genuine "no-go" for removal vans. Their elasticity is their downfall. When a van brakes or turns, a bungee allows the load to shift. This movement creates kinetic energy. By the time the cord reaches its limit, the furniture already has enough momentum to snap the hook or tip the entire stack. Stick to rigid webbing for a reliable hold.
When to Use Simple Webbing Ties
These are essentially long ribbons of durable fabric with a simple cam buckle or a manual tie-off system. They're perfect for the "soft" side of moving where you need a firm but gentle touch. Use them for tasks such as:
- Securing removal blankets around polished wood surfaces like sideboards or dining tables.
- Tying dining chair legs together to prevent them from rattling or rubbing against each other.
- Creating internal "loops" within the van's load rails to keep light stacks of boxes from sliding forward.
When to Upgrade to Ratchet Straps
Ratchet straps are the heavy hitters of the removals world. They use a handle-and-sprocket system to provide mechanical advantage, allowing you to tighten the strap far beyond what human strength alone could achieve. You'll need these for heavier challenges:
- Securing heavy "white goods" like washing machines, dishwashers, or fridges.
- Anchoring tall, top-heavy wardrobes to the van's internal ribs to prevent them from tipping over.
- Managing pallet loads or bulk items for commercial or office moves.
The locking mechanism ensures that once the strap is tight, it stays tight until you manually release it. This provides peace of mind that nothing will budge, even on the bumpiest UK roads.
Preparing the Load: Anchor Points and Furniture Protection
Before you begin tightening your first strap, you need to understand the environment inside your removal van. Most UK hire vans are equipped with internal "load rails" or lashing bars that run horizontally along the plywood-lined walls. These are your primary security points. Understanding how to use webbing straps for moving effectively starts with a quick inspection of these rails. If you see any loose screws or splinters in the wooden lashing bars, avoid using that specific section. It's much better to adjust your van layout than to risk a rail pulling away from the wall mid-journey.
Every strap has a Break Strength (BS) and a Working Load Limit (WLL). Whilst the BS tells you the point at which the strap will snap, the WLL is the figure you should actually follow. As a rule of thumb, the combined WLL of all your straps should be at least half the weight of the items you're securing. This isn't just a suggestion; it's a principle derived from Federal cargo securement rules, which professionals use to keep heavy loads stable under the forces of braking and turning.
Identifying Secure Anchor Points
Modern vans often feature "E-track" systems, which are metal rails with rectangular slots. These are incredibly secure and allow for precise strap placement. Traditional wooden lashing rails are also common in many UK Luton vans. If your van lacks side rails, look for floor cleats. These metal loops bolted to the chassis are perfect for anchoring heavy appliances like washing machines. Always give an anchor point a firm tug before you thread your webbing through it. If it rattles or feels flimsy, find a different spot. You can find professional-grade equipment on our main site at phoenixsuppliesonline.co.uk to get your kit ready before the big day.
Protecting Surfaces from Tension Damage
The biggest mistake DIY movers make is letting the webbing touch bare furniture. This leads to "strap burn," where the friction of the polyester ribbon polishes or scuffs the finish of your wood or fabric. Always follow the "Blanket Buffer" rule. This means placing a thick layer of protection between the strap and the item. Using furniture covers provides a primary layer of defence that prevents the webbing from digging in.
For sharp wooden edges or delicate corners, fold a removal blanket into a thick pad and slide it under the strap at the pressure points. This distributes the tension and prevents the strap from "biting" into the wood. Finally, pay close attention to the metal buckle or ratchet handle. Ensure the hardware is positioned in the "air gap" between items or against a flat, protected side of the van wall. Never let a metal buckle rest directly against a polished surface, even with a blanket in between, as the vibration of the road can still cause indentations.
How to Secure Furniture: A Step-by-Step Threading Guide
Mastering how to use webbing straps for moving is mostly about muscle memory and logic. Once you understand how the buckle grips the fabric, you'll never worry about a loose load again. Before you begin, always follow workplace safety best practices by inspecting your gear. Check the full length of the strap for any small nicks or oil stains. Even a tiny fray can significantly reduce the weight rating of the polyester, making it unsafe for heavy lifting or transit.
Once you've confirmed your equipment is in top condition, follow these foundational steps to prepare your furniture for the journey:
- Step 1: Position and Anchor. Pass the strap through your chosen anchor point on the van wall. Wrap the long end around the furniture item, ensuring it sits flat against the protective blankets we discussed earlier.
- Step 2: Apply Tension. Pull the webbing through the buckle until the strap is snug. You want the furniture to be held firmly against the van wall, but don't pull so hard that you see the wood frame begin to flex or the cardboard boxes start to buckle.
- Step 3: Secure the Tail. Never leave excess webbing trailing on the floor. It's a tripping hazard and can get caught in the van door. Tie the "tail" off with a simple knot around the tensioned part of the strap or tuck it neatly behind the furniture.
Threading a Standard Webbing Buckle
Simple webbing ties usually feature a cam buckle with a spring-loaded set of metal teeth. To thread these correctly, press the lever to open the "jaws" and feed the webbing through from the bottom. This is the "under and over" technique. The strap must enter from the side where the teeth will bite into the fabric when you pull it tight. Always perform a "tug test" before you close the van door. Pull the strap in the opposite direction of the buckle; if it slides, you've likely threaded it from the wrong side. Turn the strap around and try again until the grip is rock-solid.
Operating a Ratchet Mechanism
Ratchet straps provide much more power, so they require a bit more care. Start by opening the handle fully until it's in the "neutral" or flat position. This exposes the central mandrel, which is the rotating pin with a slot in the middle. Feed the webbing through that slot and pull the excess through until the strap is fairly tight around your appliance or wardrobe. Now, begin "cranking" the handle back and forth. This winds the webbing around the mandrel, building immense pressure. To release the strap at your destination, pull the spring-loaded release bar inside the handle and open the ratchet completely flat. You'll hear a "clack" as the tension disengages, allowing you to pull the webbing free without struggling against a jammed mechanism.
Safety First: Avoiding Common Strapping Mistakes
Even if you've mastered the mechanical side of how to use webbing straps for moving, your furniture isn't out of the woods yet. Anxiety about items falling over often leads DIY movers to over-tension their straps. Whilst you want the load to be firm, applying too much pressure can easily crush double-walled cardboard boxes or even crack the delicate timber frames of antique chairs. If you buy fine antique furniture for your home, you'll know that such pieces require a snug fit that prevents movement, not a grip that warps the furniture's natural shape. If you see the webbing starting to dig deeply into the padding, it's time to back off the tension slightly.
Another common error is allowing the webbing to twist as you thread it through the anchor points. A flat strap distributes pressure across its entire width, usually 25mm or 50mm. If the strap is twisted, that same force is concentrated onto a narrow, rope-like edge. This concentrated pressure is much more likely to leave permanent indentations on soft upholstery or leather. Always take an extra few seconds to smooth the strap flat against the item before you begin to tighten the buckle.
The "Strap Burn" Phenomenon
On long-distance journeys across the UK, vibration is your hidden enemy. As the van travels, the tiny movements of the vehicle cause the polyester to rub against the item. This can lead to "strap burn," where the friction acts like a slow-moving saw on soft wood or leather. To prevent this, ensure you've used high-quality webbing straps and check them every 50 miles. Straps can settle and loosen over time, so regular inspections are vital for a damage-free arrival. For palletised items or bulkier stacks, consider using cardboard V-boards to create a rigid corner that the strap can pull against without touching the goods.
Securing the Excess Webbing
Once your items are secure, you'll often have a long "tail" of excess webbing left over. Never leave this dragging on the floor; it's a major tripping hazard and can easily get caught in the van's rolling rear door. Professional removalists often use the "daisy chain" method, which involves looping the tail into a series of interlocking knots to keep it tidy and off the ground. Strap flutter is a vibrating hum caused by air movement or loose fabric that indicates your tensioning isn't quite right. You can find all the professional-grade gear you need to avoid these pitfalls at phoenixsuppliesonline.co.uk.
Organising Your Van for Stability and Efficiency
The final secret to a successful move isn't just about the strength of your gear; it's about the order in which you pack the van. Even the most secure knots won't help if your heavy fridge-freezer is leaning against a stack of fragile boxes. Professional removalists use the "Tier" system to manage space. This involves loading the van in vertical slices from the floor to the ceiling, starting at the front bulkhead. Once one vertical slice is complete, you use a strap to secure that entire section before starting the next. Learning how to use webbing straps for moving in this systematic way prevents the "domino effect" if you have to brake suddenly on the motorway.
By building these tiers, you create a series of internal walls. This method keeps the weight distributed evenly and ensures that items from the back of the van can't slide forward into the cab area. It turns a chaotic pile of furniture into a solid, interlocking structure that moves as one single unit with the vehicle.
Strategic Loading Patterns
Always place your heaviest "white goods" and large furniture items against the front bulkhead, which is the wall directly behind the driver's seat. This keeps the centre of gravity low and stable. You can then use these heavy items as "bulkheads" themselves, leaning lighter stacks of boxes or dining chairs against them. Use your webbing to create horizontal "belts" across each tier, anchoring them to the side rails. Don't forget about "dead spaces" under tables or inside wardrobes. These are perfect spots for floor lamps or rolled-up rugs, provided they are padded with blankets and tucked in where they won't rattle.
Quality Matters: Why Professional Webbing Wins
When you're browsing for supplies, you'll often see cheap nylon straps in supermarkets. These may look the part, but they often lack the "bite" and durability of high-tenacity polyester. At Phoenix Supplies UK, we're a family-run business that takes pride in providing the same professional-grade kit that removal experts use every day. We select our straps for their reliability and ease of use, ensuring you get commercial quality at DIY prices. Before you set off, run through this final checklist:
- Are all straps threaded through secure, tested anchor points?
- Is there a blanket buffer between every strap and every piece of furniture?
- Are all "tails" tied off and clear of the floor?
- Have you performed the "Shake Test"?
The Shake Test is simple. Before you close the rear shutter, give each large item a firm tug. If it moves independently of the van, the strap needs another click of the ratchet or a tighter pull on the buckle. Once everything feels like part of the van itself, you're ready to go. Equip your move with our professional-grade webbing straps and ties.
Ready to Move with Professional Confidence
Moving house is a significant milestone, and the experience shouldn't be overshadowed by the worry of damaged furniture or shifting loads. By mastering how to use webbing straps for moving, you've gained the practical skills used by professional removalists to keep every item stable and secure. Remember to always prioritise the "Blanket Buffer" rule to protect polished surfaces and load your van in vertical tiers to prevent heavy items from moving during transit.
Having the right kit makes all the difference to your peace of mind. We are a family-run UK business dedicated to providing the same professional-grade equipment used by removalists, backed by expert advice to support your move. We also offer free delivery on all orders to help keep your relocation costs manageable. Browse our range of heavy-duty webbing straps and moving supplies today to ensure your belongings arrive at your new front door in perfect condition. With the right tools and these techniques in hand, you're well-equipped for a smooth, damage-free journey.
Frequently Asked Questions
How many webbing straps do I need for a 3-bedroom house move?
You will generally need between 10 and 15 webbing straps for a standard three-bedroom house move. This quantity allows you to secure large appliances like your washing machine and fridge, whilst also providing enough ties to anchor each vertical tier of boxes. Having a few extras is always wise to manage oddly shaped items like garden furniture or bicycles that might shift during transit.
Can I use webbing straps to secure a mattress to the roof of my car?
We strongly advise against using webbing straps to secure a mattress to a car roof. Mattresses act like sails in the wind and can create enough lift to pull away from the vehicle or cause you to lose control. It is much safer to use a proper removal van where the mattress can be stood on its side and strapped securely to the internal load rails.
What is the difference between a cam buckle and a ratchet strap?
The main difference lies in how they apply tension. A cam buckle relies on you pulling the strap through a spring-loaded set of teeth, which is ideal for lighter items or holding blankets in place. A ratchet strap uses a mechanical handle to crank the webbing much tighter, making it the better choice for heavy wardrobes or white goods.
How do I stop my straps from scratching my wooden furniture?
You should always use a removal blanket or a dedicated furniture cover as a buffer between the strap and the wood. This prevents strap burn caused by the polyester webbing rubbing against the finish during the journey. Ensure the metal buckle is positioned away from the face of the furniture to avoid indentations from road vibrations.
Are webbing straps reusable, or should I buy new ones for every move?
High-quality webbing straps are designed to be reused many times as long as they are stored in a dry place and kept free from oil. You must inspect them before every use for any signs of fraying, nicks, or sun damage. If you find a tear in the fabric or a bent buckle, it's time to replace the strap to ensure your safety during the move.
How much weight can a standard 25mm webbing tie hold?
A standard 25mm webbing tie typically has a Working Load Limit (WLL) of around 250kg, but you must always check the sewn-in manufacturer's tag for the exact rating. Understanding how to use webbing straps for moving safely means never exceeding this limit. For items heavier than this, such as a large American-style fridge, you should upgrade to a 50mm heavy-duty ratchet strap.
What should I do if a ratchet strap gets jammed and won’t release?
If a ratchet strap is jammed, you need to pull the spring-loaded release bar and open the handle as far as it will go until it is completely flat. This 180-degree position disengages the locking gears and should allow the webbing to slide free. Avoid using screwdrivers or hammers to pry the mechanism open, as this can damage the gears and make the strap unsafe for future use.
Do I need to use straps if the van is packed tightly with boxes?
Yes, you should still use straps even if the van feels tightly packed. As you drive, the contents will naturally settle and shift, which can create small gaps that allow boxes to topple over. Using webbing straps to secure each tier or vertical section ensures that even if the load settles, it remains held firmly against the van walls and won't slide forward when you brake.


